Give your boring old heels a rock star makeover with duct tape! This surprisingly easy DIY tutorial can transform any pair of heels into the star of #shoegasmsaturday!
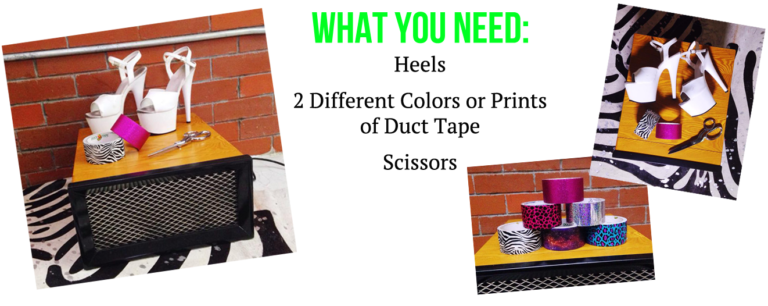
1. Cut a strip of duct tape and cover the top toe strap. Make sure the top edge of the tape meets the top edge of the toe strap and the excess tape hangs off the bottom.
2. Cut perpendicularly into the excess tape.
3. Fold the tape under.
4. Smooth out the excess tape on the inside of the shoe.
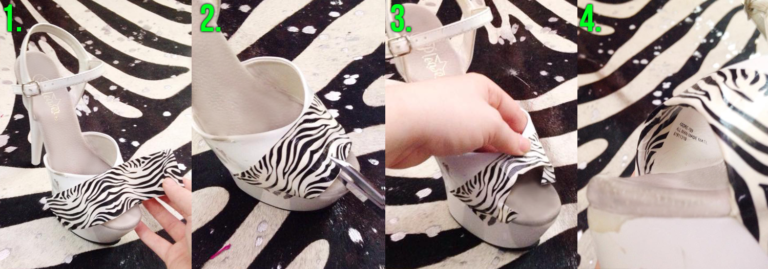
5. Cut a strip of duct tape and layer it above the the first piece. It will go from the left side to the center of the toe strap. The excess tape should hang over the top.
6. Cut off the excess tape leaving about 1/2″ of tape hanging over the edge.
7. Cut straight into the excess tape and fold over the edge.
8. Smooth out any bumps inside and out.
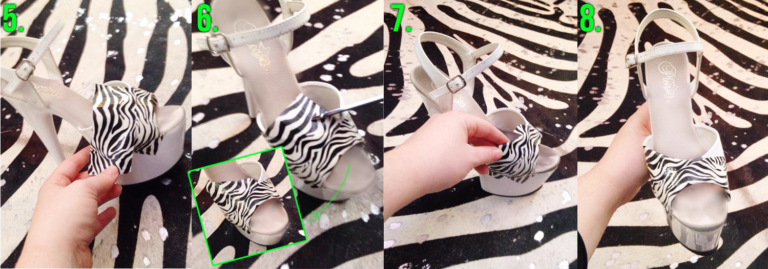
9. Repeat step 5-8 on the right side
10. Cut off a small piece of duct tape and layer it onto the exposed corner of the toe strap.
11. Cut the tape into the corner, where the toe strap meets the footbed
12. Fold the excess tape into the shoe and cut off the tape that hangs over the edge of the footbed. Repeat on the other side.
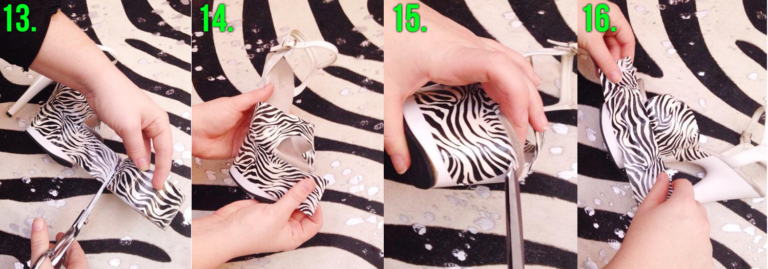
13. Cut and place a piece of duct tape from the center back to the center front of the platform following the top edge of the platform.
14. Make sure to pull the tape tight so it conforms to the platform without bubbles.
15. Cut off any excess tape that hangs over the footbed.
16. Repeat on the other side overlapping with first piece of tape in the front and back.
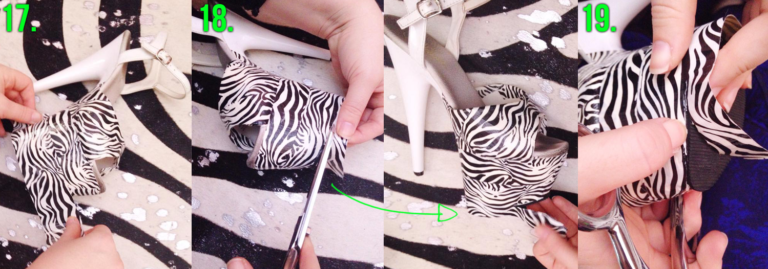
17. Add a second layer of duct tape on the bottom half of the platform from center back to center front. Pull it tight so it conforms to the platform without bubbles.
18. Cut off the excess tape that is hanging over the platform (about 1″ of tape will be hanging over).
19. Use your fingernail to push the edge of the tape into the base of the platform. Repeat Step 17-19 on the other side.
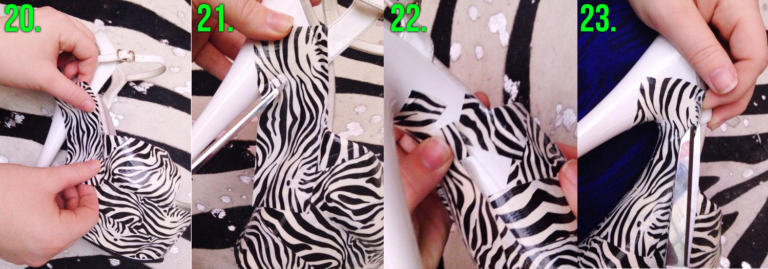
20. Cut and place a piece of duct tape along the side edge of the footbed.
21. Cut into the excess tape at the bottom.
22. Smooth the excess tape under.
23. Cut off the excess tape at the top that hangs over the footbed. Repeat on the otherside.
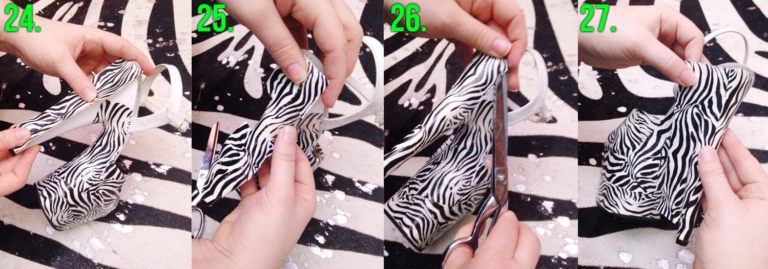
24. Place a piece of duct tape down the center back of the heel.
25. Cut into each side of the tape and smooth around the heel.
26. Cut off the excess tape that hangs over the bottom of the heel and above the footbed.
27. Layer another piece of duct tape over the side of the heel. It should overlap and cover all exposed areas on that side of the heel.
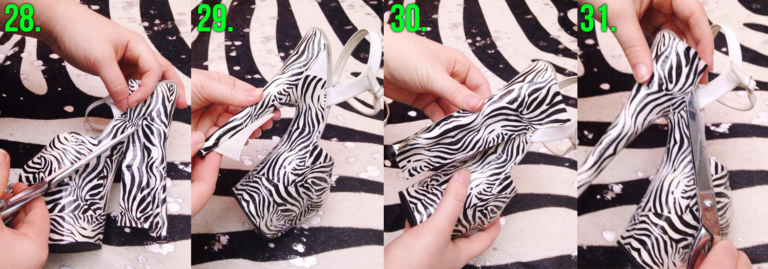
28. Cut into the excess tape.
29. Wrap around the heel.
30. Repeat step 30-32 on the otherside
31. Cut off any excess tape on each side.At this point all desired areas should be covere in duct tape.
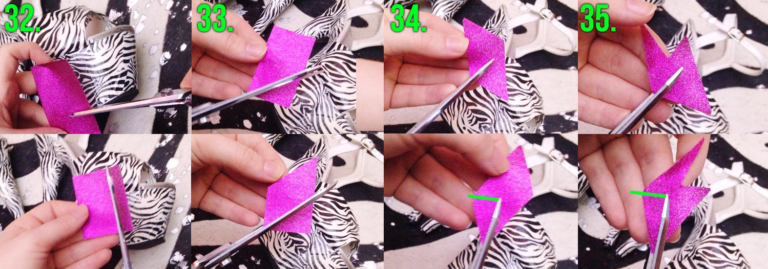
Now to make your Cleo Lightening Bolt!
32. Measure your glitter duct tape against the platform and cut it a little bit shorter. Then cut about 1/4″ off the long side of the tape.
33. Cut diagonally across the top and bottom.
34. Cut in from the narrow side of the diamond to about mid way. Cut up from the bottom point to meet the first cut.
35. Repeat the process on the otherside.
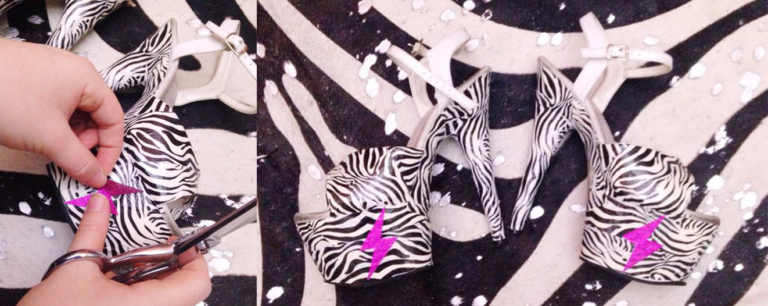
Place your lightening bolt and you’re ready to rock #SHOEGASMSATURDAY!
Make sure to share and tag your pics!


Jillian is an avid pole dance student, accessories and costume designer, rhinestone aficionado, and a PDBloggers Executive Committee Member. She also writes at PoleGeekBlog.com.


